![]()
MockupUI Reference Manual
Contents
User interface
UI widgets
Graphic widgets
Working with widgets
Annotations
Visual styles
Templates
Exporting
Projects
Setup
Help
Exporting mockup designs
MockupUI allows you to export designs in four different manners:
- Copy to clipboard
- Export screenshots to individual image files
- Export documentation
- Export presentation
Exporting to clipboard
Click the File > Copy to clipboard from the menu or the Export to clipboard tool button. This will create
an image snapshot of the current design and will place it on the clipboard of your operating system.

You can then paste it to Word, PowerPoint or other documents that support image files.
Exporting to image files
Click the Export Screenshots to activate the export dialog box.

Select an output directory, a file naming method, an output file format and click Ok.
Optionally you can resize the output images to new dimensions by setting the resizing method, the dimensions or the scale.
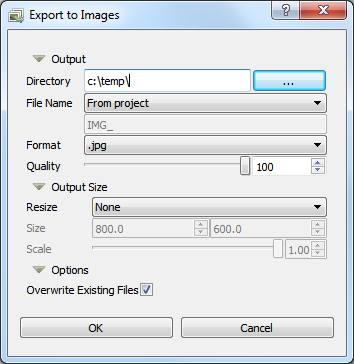
Output Directory
Directory: Selects the output directory where the images will be saved.
File Name: Selects the naming method of the output files:
Custom name: Allows you to specify a custom file name. MockupUI will append the index of the image for each output file (Image#1.png).
From project: Uses the names visible in the header of the design browser.
Format: Select the format of the output files:
Portable Network Graphics (.png)
JPEG (jpg)
Windows Bitmap (bmp)
Tagged Image File Format (tif)
Portable Pixmap (ppm)
Output Size
By selecting a Resize method MockupUI will automatically scale the image up or down in order to fit the specified dimensions.
Scale: Use the Scale parameter to specify a custom scale.
Fit: The image is automatically scaled to fit inside the rectangle of the specified size. All the output images will have the same size. Transparent or black bands may be visible on the sides. The aspect ratio is preserved.
Fit Exact: The image is automatically scaled to fit inside the rectangle of the specified size. Output images will not have the same size. No lateral bands are added. The aspect ratio is preserved.
Stretch: The image is automatically stretched to fit the specified dimensions. The aspect ratio is not preserved.
Fill: The image is automatically scaled and cropped to fill a rectangle of the specified size. The aspect ratio is preserved.
Options
- Overwrite Existing Files: if checked, MockupUI will overwrite the existing files. Otherwise a copy number is appended at the end of the file name (Design1, Design2, ...).
Exporting documentation
MockupUI allows you to compile designs and notes into complete UI specification documents. You can export the designs to Word, PDF and HTML documents, one design per page.

Select File > Export Documentation or click the Export Documentation tool button. A dialog box will open allowing you to select the document name,
output directory, page orientation and page margins.
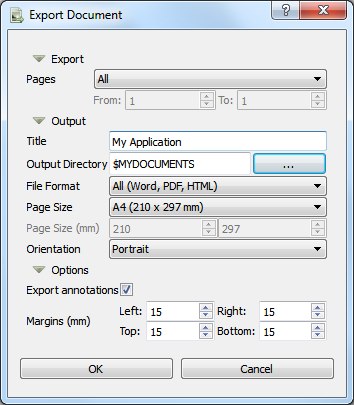
Pages
Specifies the designs to export.
All: all designs in the project.
Current: exports only the currently selected design.
Range: specifies a range of designs to be exported.
Document Title
Specifies the name of the output file and the document's title. If a file with the same name exists it will be overwritten.
Output Directory
Selects the directory where the document will be saved.
File Format
Selects the output document file format. + All: will generate three files, Word (.docx), PDF and HTML. + Word: will generate a Microsoft Word docx file. + PDF: will generate a file in portable document format. + HTML: will generate a HTML file.
Page Size
Specifies the page dimensions by choosing from a list of common formats or enter a custom size in millimeters.
Orientation
Selects the page orientation (portrait or landscape).
Export annotations
Specifies if the annotations should be exported to the document. If not ticked, only images will be exported to the document.
Margins
Specifies the page margins in millimeters.
Exporting presentations
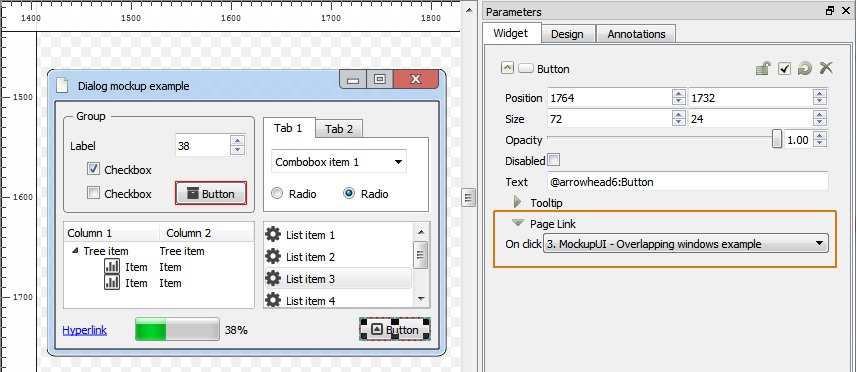
MockupUI offers the possibility to build interactive presentations from designs. All you need to do is to define links
between widgets and target pages. Page linking can be set for any widget that has a Page Link selector which specifies the taget page.
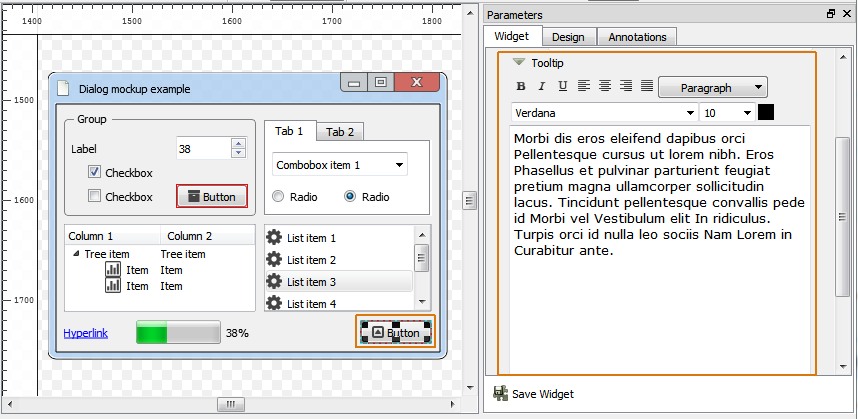
Also you can define a tooltip for any widget using the Tootlip section of the Widget tab.
To generate an interactive presentation select File > Export Presentation or click the Export Presentation tool button.

A dialog box will open allowing you to select the name of the presentation, the output directory, output image format and some options.
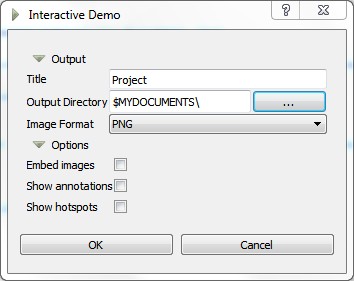
Title
Specifies the name of the output file and the title of the presentation. If a file with the same name exists it will be overwritten.
Output Directory
Selects the directory where the interactive document will be saved.
Image format
Selects the format of the output image files:
Portable Network Graphics (.png)
JPEG (jpg)
Options
Embed images: If checked, the images will be embedded into the output html presentation file, otherwise designs are exported to separate image files. Having the entire presentation packed into a single html file comes handy when the presentation needs to be distributed to multiple people or computers.
Show annotations: Specifies if the annotations should be displayed in the presentation. If not ticked, only images are exported.
Show hotspots: If checked the clickable hotspots will be highlighted. Highlighted areas are surrounded by red lines that are either rectangular or follow the contour of the widget.
Presentation preview
Once the pages are generated the presentation is opened in the MockupUI preview window. The slides can be browsed using the next/previous control buttons or jump to a page when a widget hotspot is clicked. When you hover a widget that has a tooltip text defined, a tooltip frame with that text will be shown.
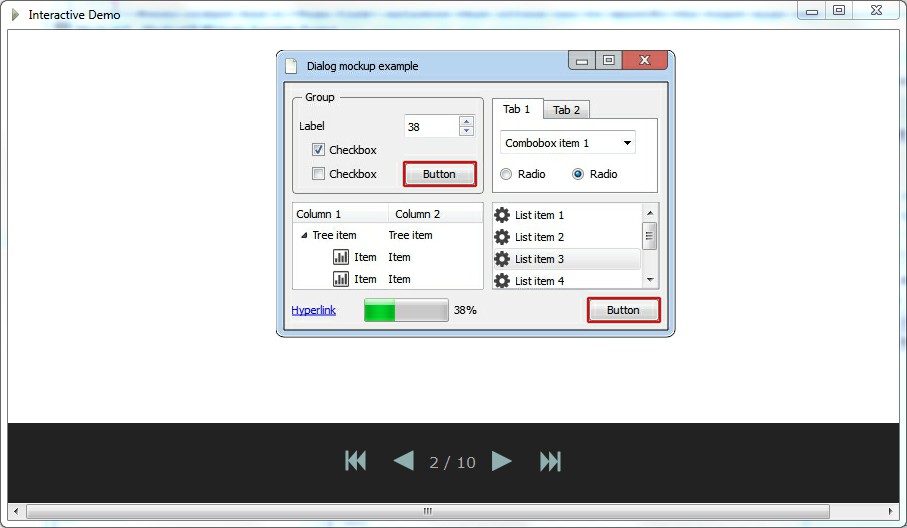
The MockupUI interactive presentation is an HTML file that can be opened in any standard web browser.